One of the most important things you can do to improve your ranking in Google is on-page SEO. As discussed in the article Introduction to On-Page SEO with WordPress, actions can be made globally to the site, but many actions need to be performed page by page.
This normally means going through every page and post on your WordPress site and making sure that targeted keywords are being used in the optimal places for SEO such as TITLE tags and Meta Descriptions. In our article How to Use Content Analysis to Improve On-Page SEO in WordPress we looked at how you can use Content Analysis with SEOPress Free to perform the most common on-page SEO jobs for any post-type.
When you are working on a large WordPress site it can be difficult to keep track of which pages have been optimized and which pages still need on-page optimization. This is especially true when you have delegated on-page SEO to another person or a team of people.
To help with monitoring this work, SEOPress offers the possibility to add specific columns to the WordPress admin screens where you view lists of pages, posts or other post-types such as products. This gives you a quick and useful overview of progress of on-page SEO.
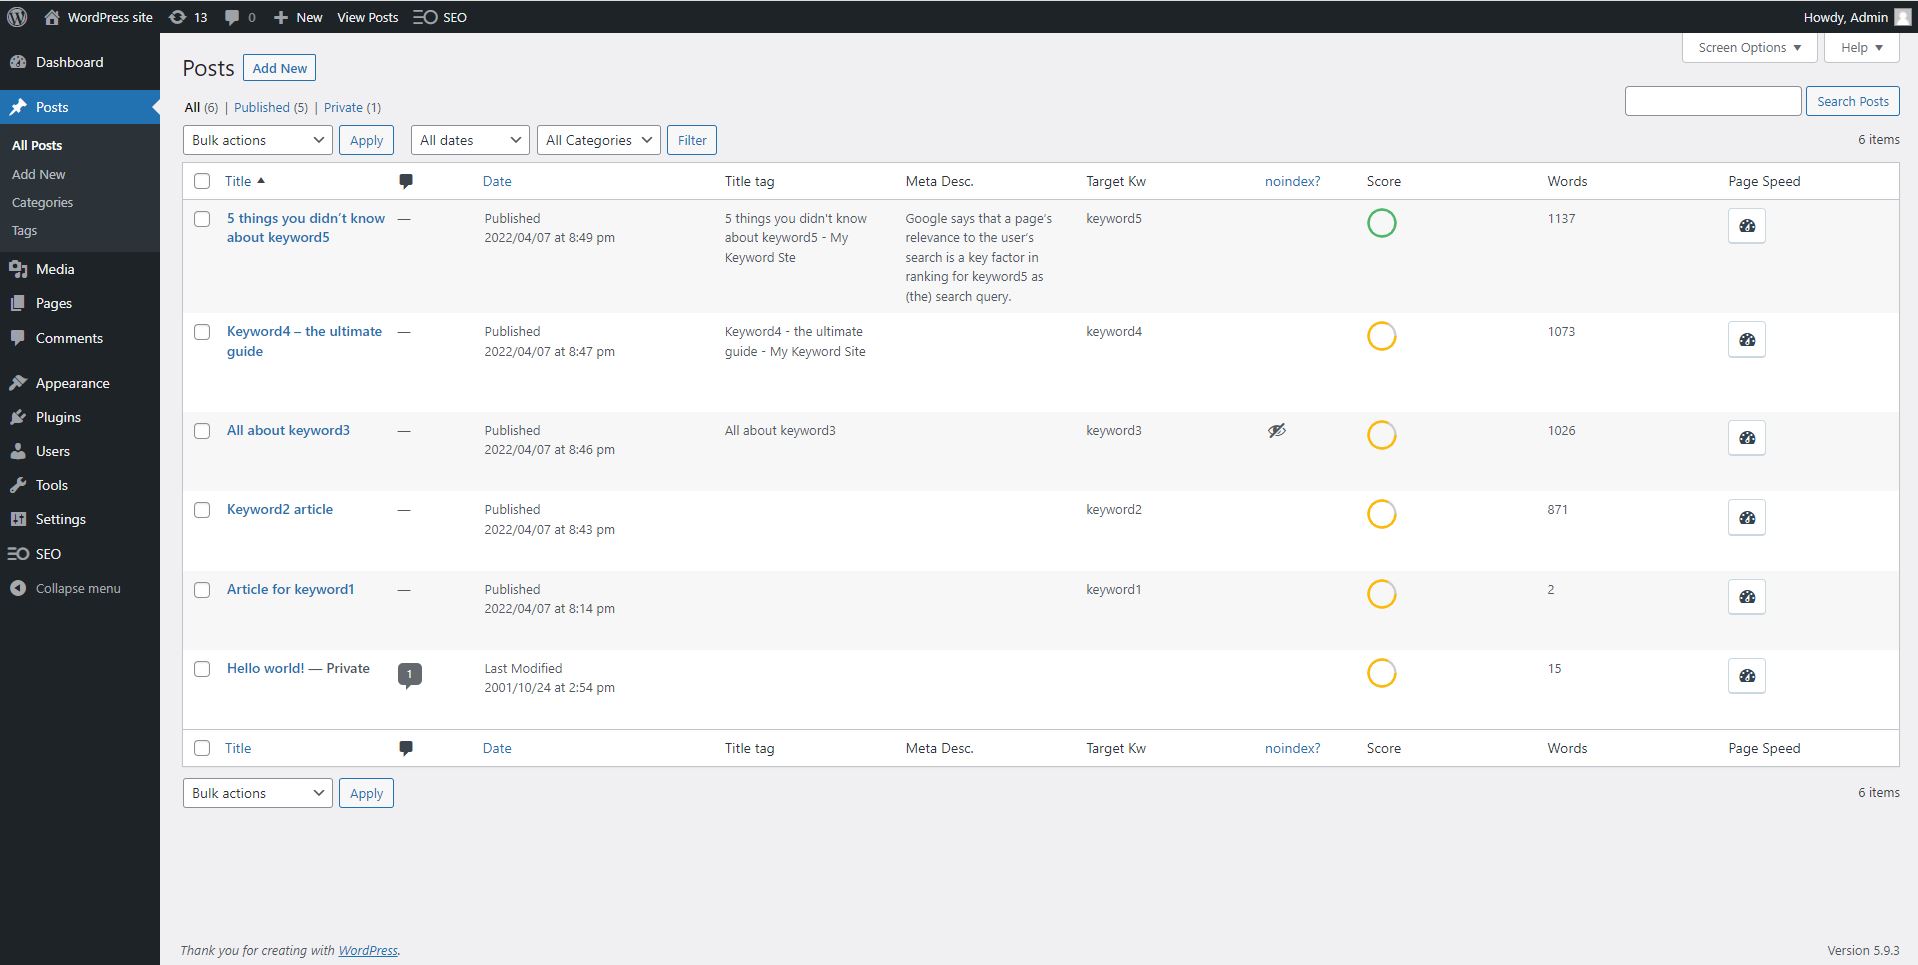
In the example above, we can see the following columns in the Posts Screen:
- This is the title of the post and a standard feature of the Post Screen. To get the best on-page SEO you should provide a unique and interesting title for every post
- This shows the Published or Last Modified date of each article. This is a standard feature of the Post Screen. It is useful for on-page SEO because by sorting posts by date, we can identify articles that need refreshing in order to benefit from the advantage given by Google to fresh content.
- Title tag. This is a column added thanks to SEOPress to show if an SEO Title has been added manually to a post.
- Meta Desc. This column is added by SEOPress and shows whether a Meta Description has been added manually to a post.
- Target kw. This column is added by SEOPress and shows the target keywords added to each post in the Content Analysis feature. It is important to set a target keyword for pages that you want to rank in Google. By adding this column to the Posts Screen, you can quickly identify posts without a target keyword.
- Noindex? This column will show a hidden visibility icon (the eye with a slash through it) if a post has the robots Meta tag set to noindex. This means that you do not want Google (or any other search engine) to index the page. This is not a good option for SEO.
- This column shows the Content Analysis score from SEOPress for each page. You should work towards having a “Good” rating for every page. While you can see pages with an orange “Needs Improving” icon in this column, you still have some on-page SEO tasks to perform.
- This column is added by SEOPress and shows the number of words in each post. Best practice is to write at least 300 words per page, but some subjects merit longer articles. Many blog posts are over 1000 words long. You can use this column to quickly assess if an article has enough words
- Page Speed. This column can be added if you use SEOPress PRO and it allows you to quickly access the PageSpeed Insights report for each page.
How to add on-page SEO indicators to the WordPress Posts Screen
The first step to setting up on-page SEO monitoring as illustrated in the screenshot above is to install SEOPress. The Free version of SEOPress will permit you to add all of the columns above except for PageSpeed. To add the PageSpeed column you will need to install SEOPress PRO.
To make the columns available in the Posts Screen, you must first make sure that the options have been selected in the SEOPress configuration. From your WordPress admin, navigate to SEO > Advanced and click on the Appearance tab.
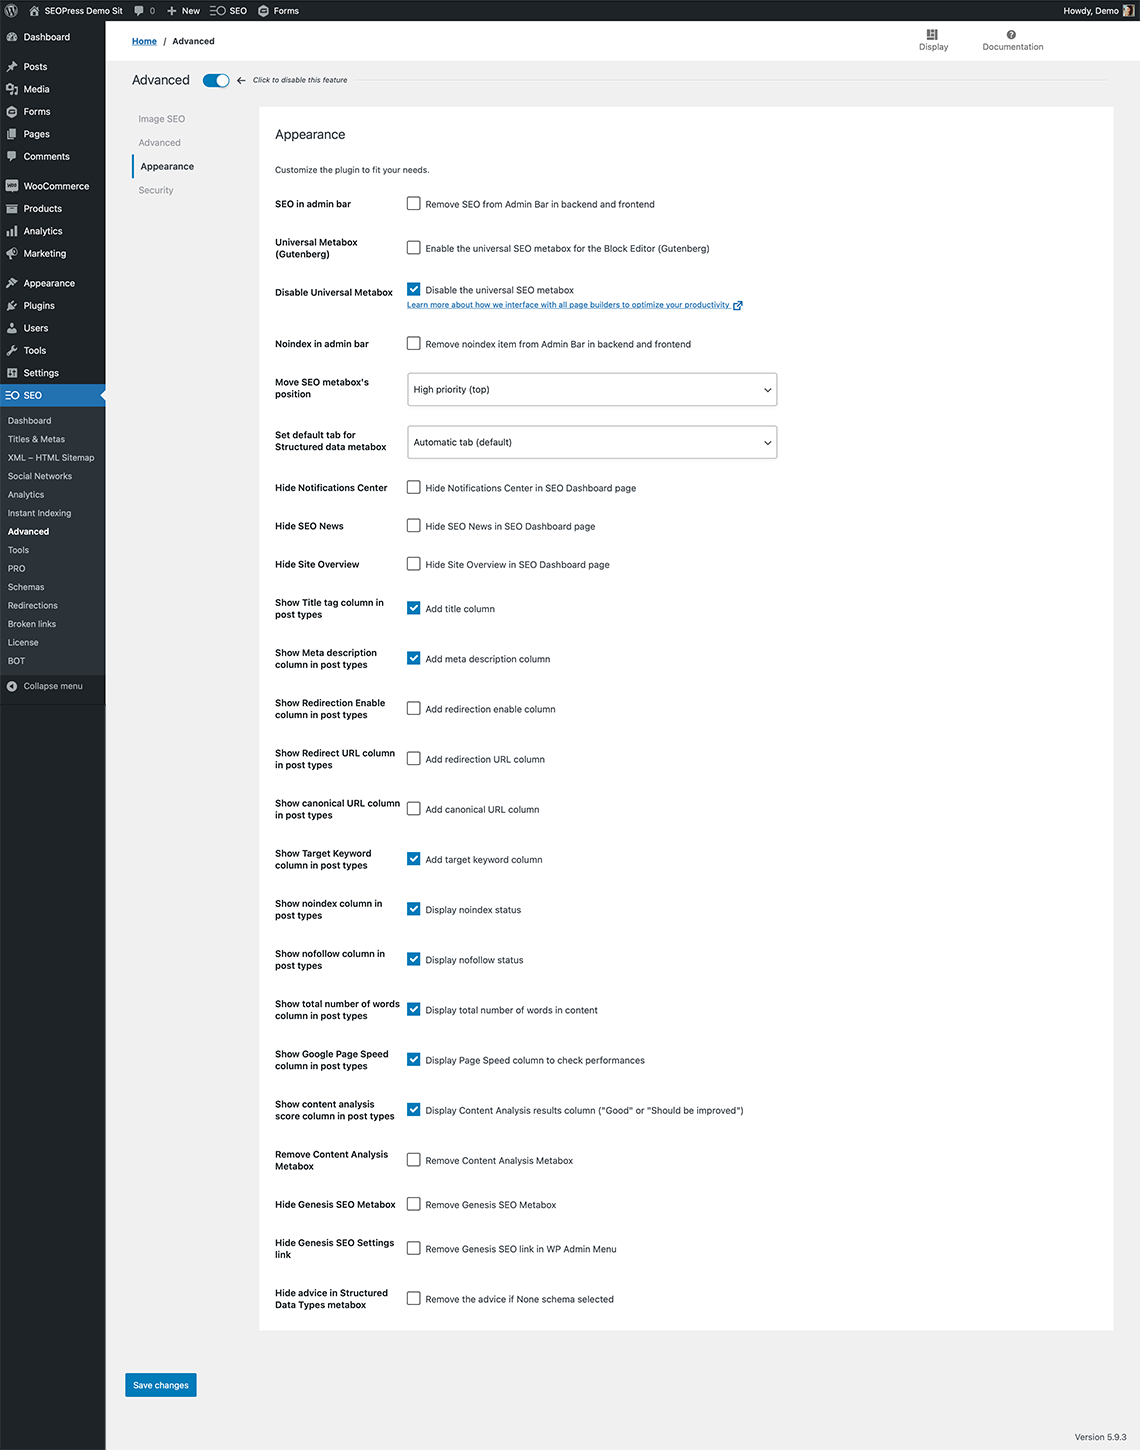
In this screen you will need to make sure that the following options are checked:
- Show Target Keyword column in post types
- Show noindex column in post types
- Show total number of words column in post types
- Show content analysis score column in post types
If you have SEOPress PRO, you can also activate “Show Google Page Speed column in post types”.
After checking all these options, make sure that you click on Save changes.
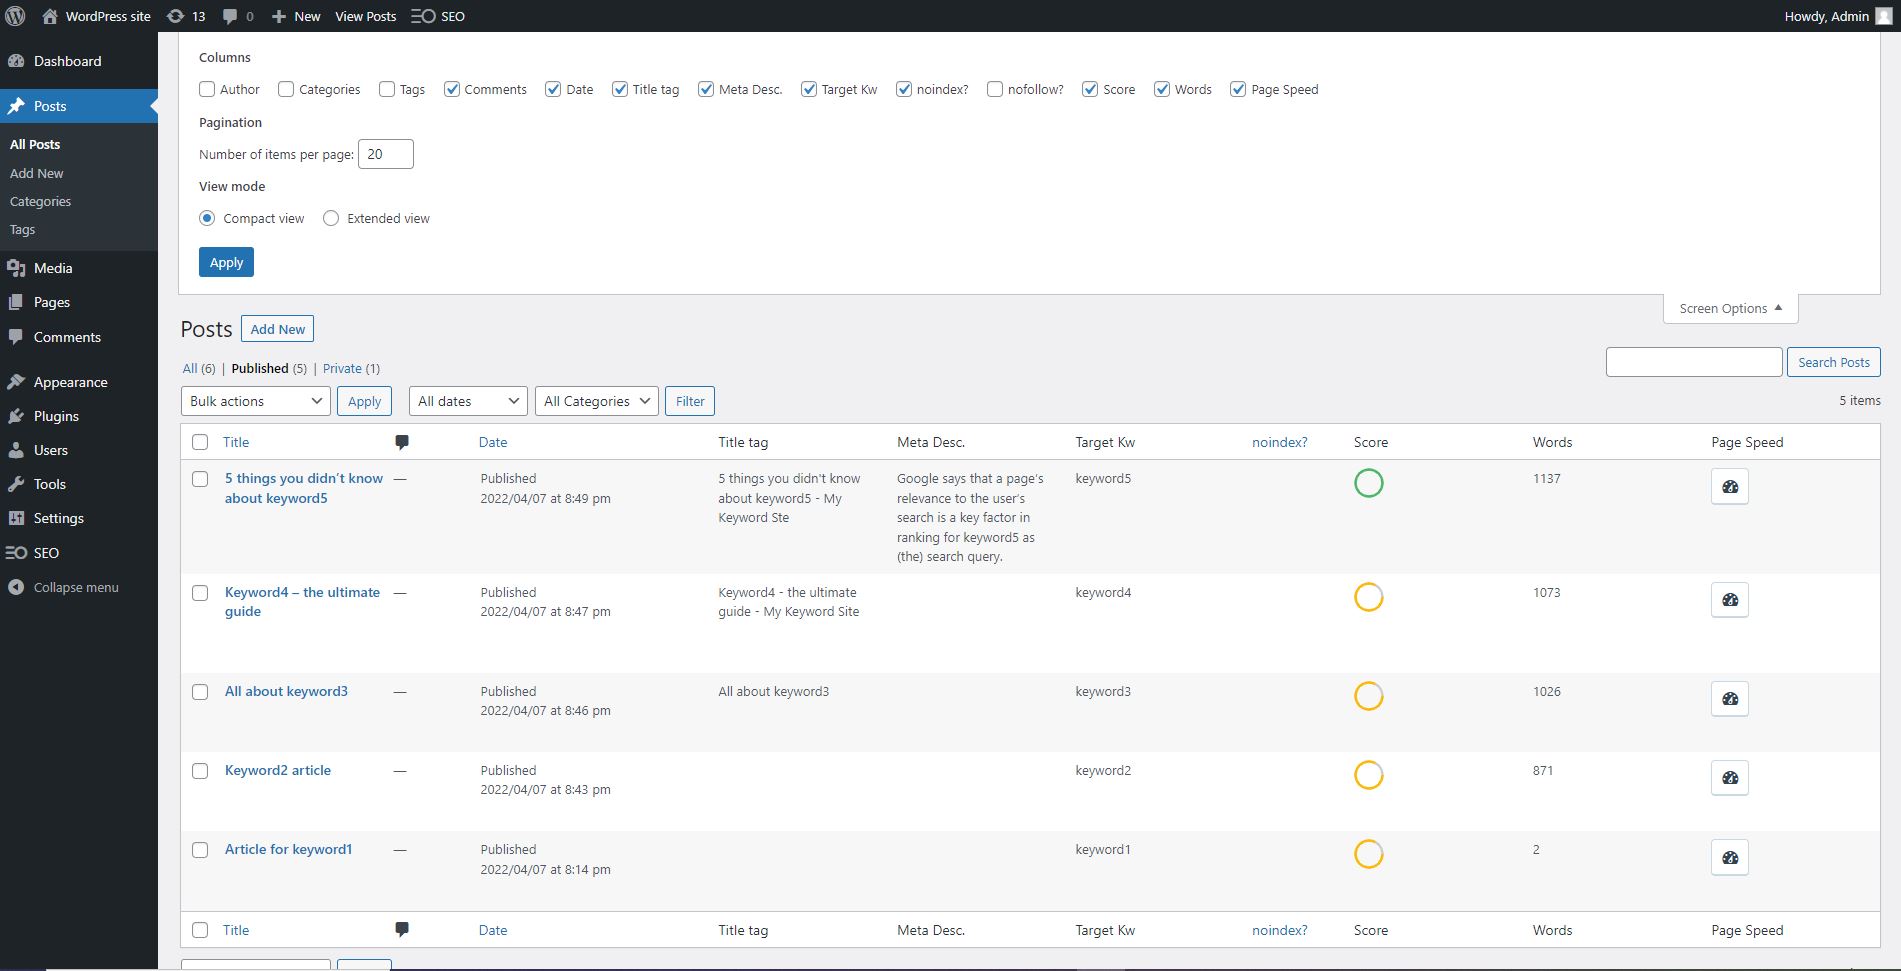
To get the same display as our example above, you need to set the columns you want to display. To do this, click on the Screen Options tab at the top right-hand side of the page. You can choose the columns you want to show, and you may want to remove columns to make the analysis of on-page SEO a little easier. To get the example shown at the beginning of this article, we have deselected Author, Categories and Nofollow. We have also selected the View mode “Compact view”.
Monitoring on-page SEO
You now have a listing of posts that you can use to monitor on-page SEO. Now that you can see that some posts still need improving you can click on the page title or Edit to check out the Content Analysis report and make suggested changes.
You should keep improving on-page SEO. Every page optimized improves your chances of getting better ranking and more traffic!