This is the second part of a 2-part article on managing a WordPress migration without breaking your SEO. In part one we had a look at analyzing your existing SEO and using a staging site to get ready.
To illustrate the main points in this article we will assume that your site is currently on https://www.mysite.com/ and that your new site will be published at this same address. The new site has been set up and launched on a staging site https://staging.mysite.com/.
Another scenario that we will keep in mind is that you are changing domain name too https://www.mysite.com/ to https://www.newsite.com/.
Setting up Google Search Console for your existing site
It is important that you have access to your existing site in Search Console before migrating.
See our guide adding your site to Google.
If you are changing domain name too, you can use the Change address tool in Search Console later. In their Move your site guide, Google recommends getting access to your new domain early in Search Console to clean it up if necessary. Depending on the previous owners of your domain name, you may need to file a reconsideration for manual actions or security issues.
Set up sitemaps
Sitemaps will be useful for indexing the new site rapidly in Google. It’s something that you can set up on your staging site and doing it before migrating is one less thing to do on D-Day.
To set up sitemaps in SEOPress, go to SEO, XML Sitemap. Check Enable XML Sitemap and Save changes. By default, the sitemap will be created on https://www.mysite.com/sitemap.xml
See our full guide on enabling XML sitemaps.
Implementing redirections early
If your staging site is online, you can implement and test redirections before launching. This is highly recommended as it will avoid launching the site with errors and reduce the risk of crashing your site when it is live.
Redirections are an important part of site migrations. Once you change site, it is possible that very few of your old URLs will still work. Rather than let search engines and users discover a lot of errors, the best practice is to redirect them to the new URL of the same content as soon as the new site launches.
If you followed the first part of the article, you should have a list of URLs in a spread sheet with existing URLs in column 1 and the new URLS in column 2.

Redirections in .htaccess
Redirections are typically added to a .htaccess file in the root directory of the site (which may be something like /www/htdocs/ in FTP). WordPress uses the directory containing the wp-config.php file – which may be a /blog/ directory for example.
You can find and edit these text files using FTP. SEOPress PRO provides an interface to edit the file via WordPress, but for simply adding redirections to this file you can use the Redirection feature of SEOPress (see below).
If you want to continue by editing the .htaccess directly, make a backup of the existing file before you start.
The .htaccess already contains a few lines added by WordPress:
# BEGIN WordPress
<IfModule mod_rewrite.c>
RewriteEngine On
RewriteBase /
RewriteRule ^index\.php$ - [L]
RewriteCond %{REQUEST_FILENAME} !-f
RewriteCond %{REQUEST_FILENAME} !-d
RewriteRule . /index.php [L]
</IfModule>
# END WordPress
Redirections can be added after this section.
A simple, single redirection, redirecting from https://www.mysite.com/product-shoes123.htm to https://www.mysite.com/shoes/mens/nike-air-max-plus-iii/ will look like this:
redirect 301 /product-shoes123.htm https://www.mysite.com/shoes/mens/nike-air-max-plus-iii/
The syntax is as follows: redirect command, the redirect type (301), the from URL, the to URL. A space is used to separate the different elements.
Note that the URL we are redirecting from does not contain the domain name or HTTPS:// it is a relative address from where the .htaccess file is. The second URL is absolute, it starts with https://
If you are interested in learning more about other features of the .htaccess file, see this guide from Kinsta.
I crashed my site! Internal server error.
The .htaccess file is part of your web server configuration. If there’s an error in your .htaccess file in the root directory, then the whole website will crash. Any URL requested will return a 500 Internal Error message. Even trying to connect to WordPress will return the same 500 Internal Error message.
You’ll be glad you made that backup! You need to go to FTP and either restore the backup or correct the .htaccess file.
If you are just adding single line redirects and you are sure that you have correctly copied the example, there are two possibilities to explore:
- Your web host is not using standard .htaccess configuration commands. Check your manual.
- There are special characters in one of the filenames (this includes spaces). If the characters are in your new URL then we suggest you change the URL before launching. If the special character is in the old URL, try adding quotes to the first URL
redirect 301 “/product-shoes 123.htm” https://www.newsite.com/shoes/mens/nike-air-max-plus-iii/
301, permanent redirects
500 and 301 are examples of HTTP status codes returned by your web server when a request for a URL is received.
Status codes 301 to 308 are redirections, indications that the URL has changed address, followed by the forwarding address.
It is very important to use 301 redirections in the case of a site migration. This code indicates that the URL has moved permanently and that this and all future requests should be directed to new URL. To a search engine this will indicate that the URL in the index needs to be replaced with the new one – the new URL will maintain the historic of the old URL: popularity, links, etc.
Using a 302, 303 or 307 redirection codes will also redirect users to the correct URL, but these are temporary redirections. Search engines will not be expected to index the new URL. If they do, they will not consider it as a replacement for the first URL.
One of the long-term symptoms of not using 301 redirections is that old URLs (as well as the old TITLEs and META Descriptions) remain listed in the search engine results months after the site migration.
You can check HTTP status codes for any URL using a tool like Webconf HTTP / HTTPS Header Checker or SEOBook’s HTTP Status codes checker.
More information on HTTP status codes from Wikipedia.
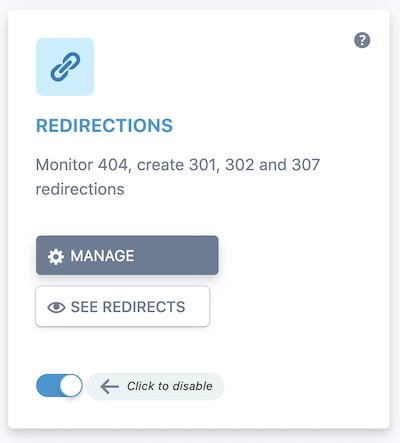
Using SEOPress Redirections
SEOPress offers a solution to program redirects without editing the .htaccess file.
Click on Redirections from the control panel or go to SEO > Redirections.
To add redirections one-by-one, you can simply click on the Add redirection button, enter the from URL as a relative address and the to URL as an absolute address (starting with http) and make sure to check “Enable redirection“. By default, the redirection type will be set to 301 Moved Permanently.
Once you Publish or Update the redirection, you can test it with the Test Your URL button at the bottom of the page.
If you want to import redirections from your Excel file, see our tutorial on importing redirects using SEOPress here.
Testing redirections on the staging site
Using the Test your URL or simply typing a URL like https://staging.mysite.com/product-shoes123.htm into your navigator, you should be redirected to the new final URL https://www.mysite.com/shoes/mens/nike-air-max-plus-iii/
This is the future URL of the page, so it won’t work yet, but just getting to this point before launching will save you from making mistakes on a live site. You could go further and set up redirections to https://staging.mysite.com/ in .htaccess to fully test redirections, but you must remember to switch back to https://www.mysite.com/ before launch.
Things to do on D-Day
Now the staging site is complete, you have access to existing site’s Google Search Console data and you’re pretty sure that redirections are going to work… it’s time to launch your new site!
Last reminder: you did change all the internal links using your redirect spreadsheet?
Check your calendar
Is it Friday afternoon?
Abort mission! Abort mission! Abort mission!
Friday is generally considered a bad day to launch a site. Dotwise wrote an article about this. Spoiler alert: They recommend Tuesday as the best day to launch a website.
Do the magic that publishes your new site
Is it not Friday? OK, push the button.
Although it may not be as simple as pushing a button, some hosting providers do provide tools to create staging sites and copy these back to the production site. Do whatever magic you need to do to make the new site work.
If you are redirecting a domain name via the control panel provided by your hosting company, make sure that these redirections are “visible” and permanent (301) redirections.
Remove password protection
If you can wait a few hours before letting visitors back on the site, you can leave .htpasswd protection while you test. Otherwise remove password protection but set all pages to NOINDEX using SEOPress NOINDEX feature. Go to SEO > Titles & Metas > Advanced and check the “noindex” option.
Check new site and redirections
First thing to do is to check your new site to make sure it works as expected. Click around and make sure that everything seems to be OK. If your site has forms, test them. If your site is an eCommerce site, test a purchase to the end.
You may need a plan to roll-back to the old site if things go wrong.
Go back to your Excel spread sheet with Existing URLs and New URLs.
The “Existing URLs” are now the old URLs and they should be redirecting to the new ones. You can copy and paste these URLs into your navigator one by one to test them. Test all the URLs if you want to be thorough.
You can also use a tool like Screaming Frog to audit a list of URLs (copy the URLs under Existing URL into Screaming Frog).
In general, it is a good idea to crawl your site at this stage. You can use software like Screaming Frog, but SEOPress PRO also has an internal BOT you can use to crawl for 404 errors within WordPress. Go to SEO > BOT and click LAUNCH BOT. If you have over 100 pages you will need to go to setting and increase the limit. When the scan is finished, click on View scan results.
Remove NOINDEX
If your site is now fit to be indexed by Google, you can remove whatever protection you may still have preventing indexation.
If you used the SEOPress NOINDEX feature. Go to SEO > Titles & Metas > Advanced and uncheck the “noindex” option if it was checked.
Also have a look at WordPress’ own Search Engine Visibility option at Settings > Reading. Make sure that is deactivated too.
Normally the robots.txt shouldn’t have been used to protect the site from early indexing. But, again, double-check to make sure that the new site has a robot.txt file and that it is set to allow crawling by robots. This example allows all robots to crawl the site.
User-agent: *
Allow: /
SEOPress PRO offers a feature to edit your robots.txt file. More info here.
From this point Google can crawl and index your new site. Rather than wait for Google to discover your new site at a later date, let’s go over to Google and ask it to start indexing the new URLs right now.
Google Search Console
If you are moving to a new domain or subdomain, you can use Google’s Change address tool. You will need to declare a new property in Google search console for the new site first. Then go back to the Search Console property of your old site, click on Settings and Change address.
Whether you have a new domain or not, you should declare your new sitemap in Google now.
Go to Index > Sitemap in the menu and enter the sitemap URL.
Google recommends keeping old sitemaps (or rather creating a sitemap of changed URLs) to track the deindexing of these pages over time. We recommend you remove them. In the latest version of Google Search Console, you can find the Remove sitemap option by clicking on the three dots (more options) menu.
Adding a Sitemap should be all you have to do to get Google to start crawling your new site. But if you don’t have a sitemap or you just want to give Google an extra hint, you can ask Google to crawl any URL. Use the search box at the top of the page to inspect your home page and click REQUEST INDEXING. This will test your page and if everything is OK queue it for indexing.
If you have removed pages from your website and you have no redirection for them (they send users to a 404 error message), you can ask Google to remove the URL from its index using the Index > Removals tool. This tool allows you to temporarily remove any URL from Google’s index, but should permanently remove a URL if it is returning a 404 status code.
You can come back in 24 to 48 hours to see if pages are starting to be indexed.
Google Analytics
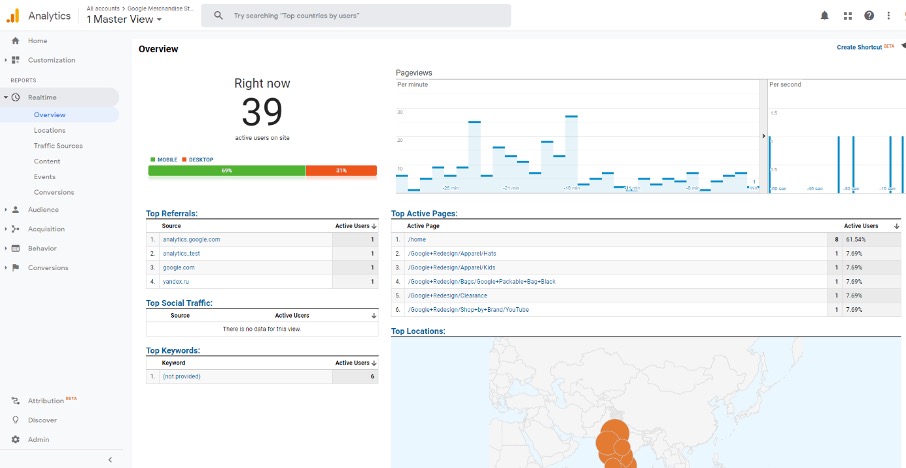
If you use Google Analytics to follow your web traffic. Make sure you added the Google Analytics tag correctly to your new site (see our guide to adding Google Analytics in SEOPress).
If Google Analytics is correctly installed check the Real Time report in Google Analytics to make sure that you can see traffic on the site.
If you changed domain name during the migration, change the domain in Admin > Property Settings and View Settings.
Over the next few days
Hopefully the next few days will go without problem. No angry phone calls from users and heaps of praise for your new site from all around you.
Search in Google
Search for your site name and see what the results look like. If you see links to pages that no longer exist, you can file a Removal request for them in Google Search Console. If you see pages that should have been redirected, click on them to check that the redirection works.
You can also search using the site: command to get a good list of pages indexed

Keep an eye on Google Search Console
Visit Google Search Console regularly.
A good place to check how indexing is going is the Sitemaps report. The number of Discovered URLs is shown for each Sitemap. And next to that number is a graphics button that will take you to a coverage report filtered to URLs from your sitemap. Here you will see if any URLs have errors, warnings or have been excluded from the index. Ideally you want all the URLs in your sitemap to be showing as Valid.
Have a look at the general Coverage report to make sure that the site is not generating errors that are not linked to URLs in your site map. Unfortunately, you will see old URLs in this report for a long time, even if you are correctly redirecting them to new ones.
Also keep an eye at the Performance report to make sure that you are not losing ranking or traffic.
Over time
Google recommends keeping redirects active as long as you can and even asks you to consider leaving them indefinitely (which is a long time, particularly near the end).
This is not our recommendation. Over time and many site migrations you may have a lot of redirections to maintain and having thousands of redirections in your .htaccess will slow your site down.
Typically, you will need to leave the redirections in place for at least a year for Google to forget the old URLs. But bear in mind that Google will continue to index URLs as long as it finds links to them on Internet. You need to start chasing down links to your site and changing them. Start with your own properties like Facebook, Twitter, etc.
Google regularly insist that redirected links pass as much PageRank as direct links. But popular SEO opinion is that the contrary is true: redirected links have less influence on your ranking than direct ones. So again, it is important to track them down and change them.
Conclusion
Hopefully this 2-part article helped you get through a site migration without any major problems and your new site has better ranking and generates more traffic than before. If you have questions or feel we have missed something out, please use the comments.
A lot of the advice in these articles referred to Google Search Console because this is the major source of search traffic for most sites. Other search engines also provide similar tools. Bing provides Webmaster Tools and Yandex provides Yandex Webmaster.
