
As part of your 2-hour-per-week routine to work on your SEO, we have dedicated Week 3 to On-Page optimization. On-Page optimization typically refers to improvements that you make to your website to help it rank better (as opposed to off-site improvements such as link building). It includes important and basic tasks such as making sure that keywords you are targeting are being used in the pages and posts that you are publishing. To learn more about this subject, download and read the eBook Improve your rankings with On-Page SEO.
In this two-hour period, you will
- Check your To-do list
- Use the SEOPress Content Analysis feature to optimize pages and posts
- Detect broken links and create redirections
Check your To-do list
At this stage, week 3 of your SEO routine, your To-do list should be filling up with things to do. The first step is therefore to open your SEO spreadsheet (created and updated during week 1) and see if there are any tasks that need your attention.
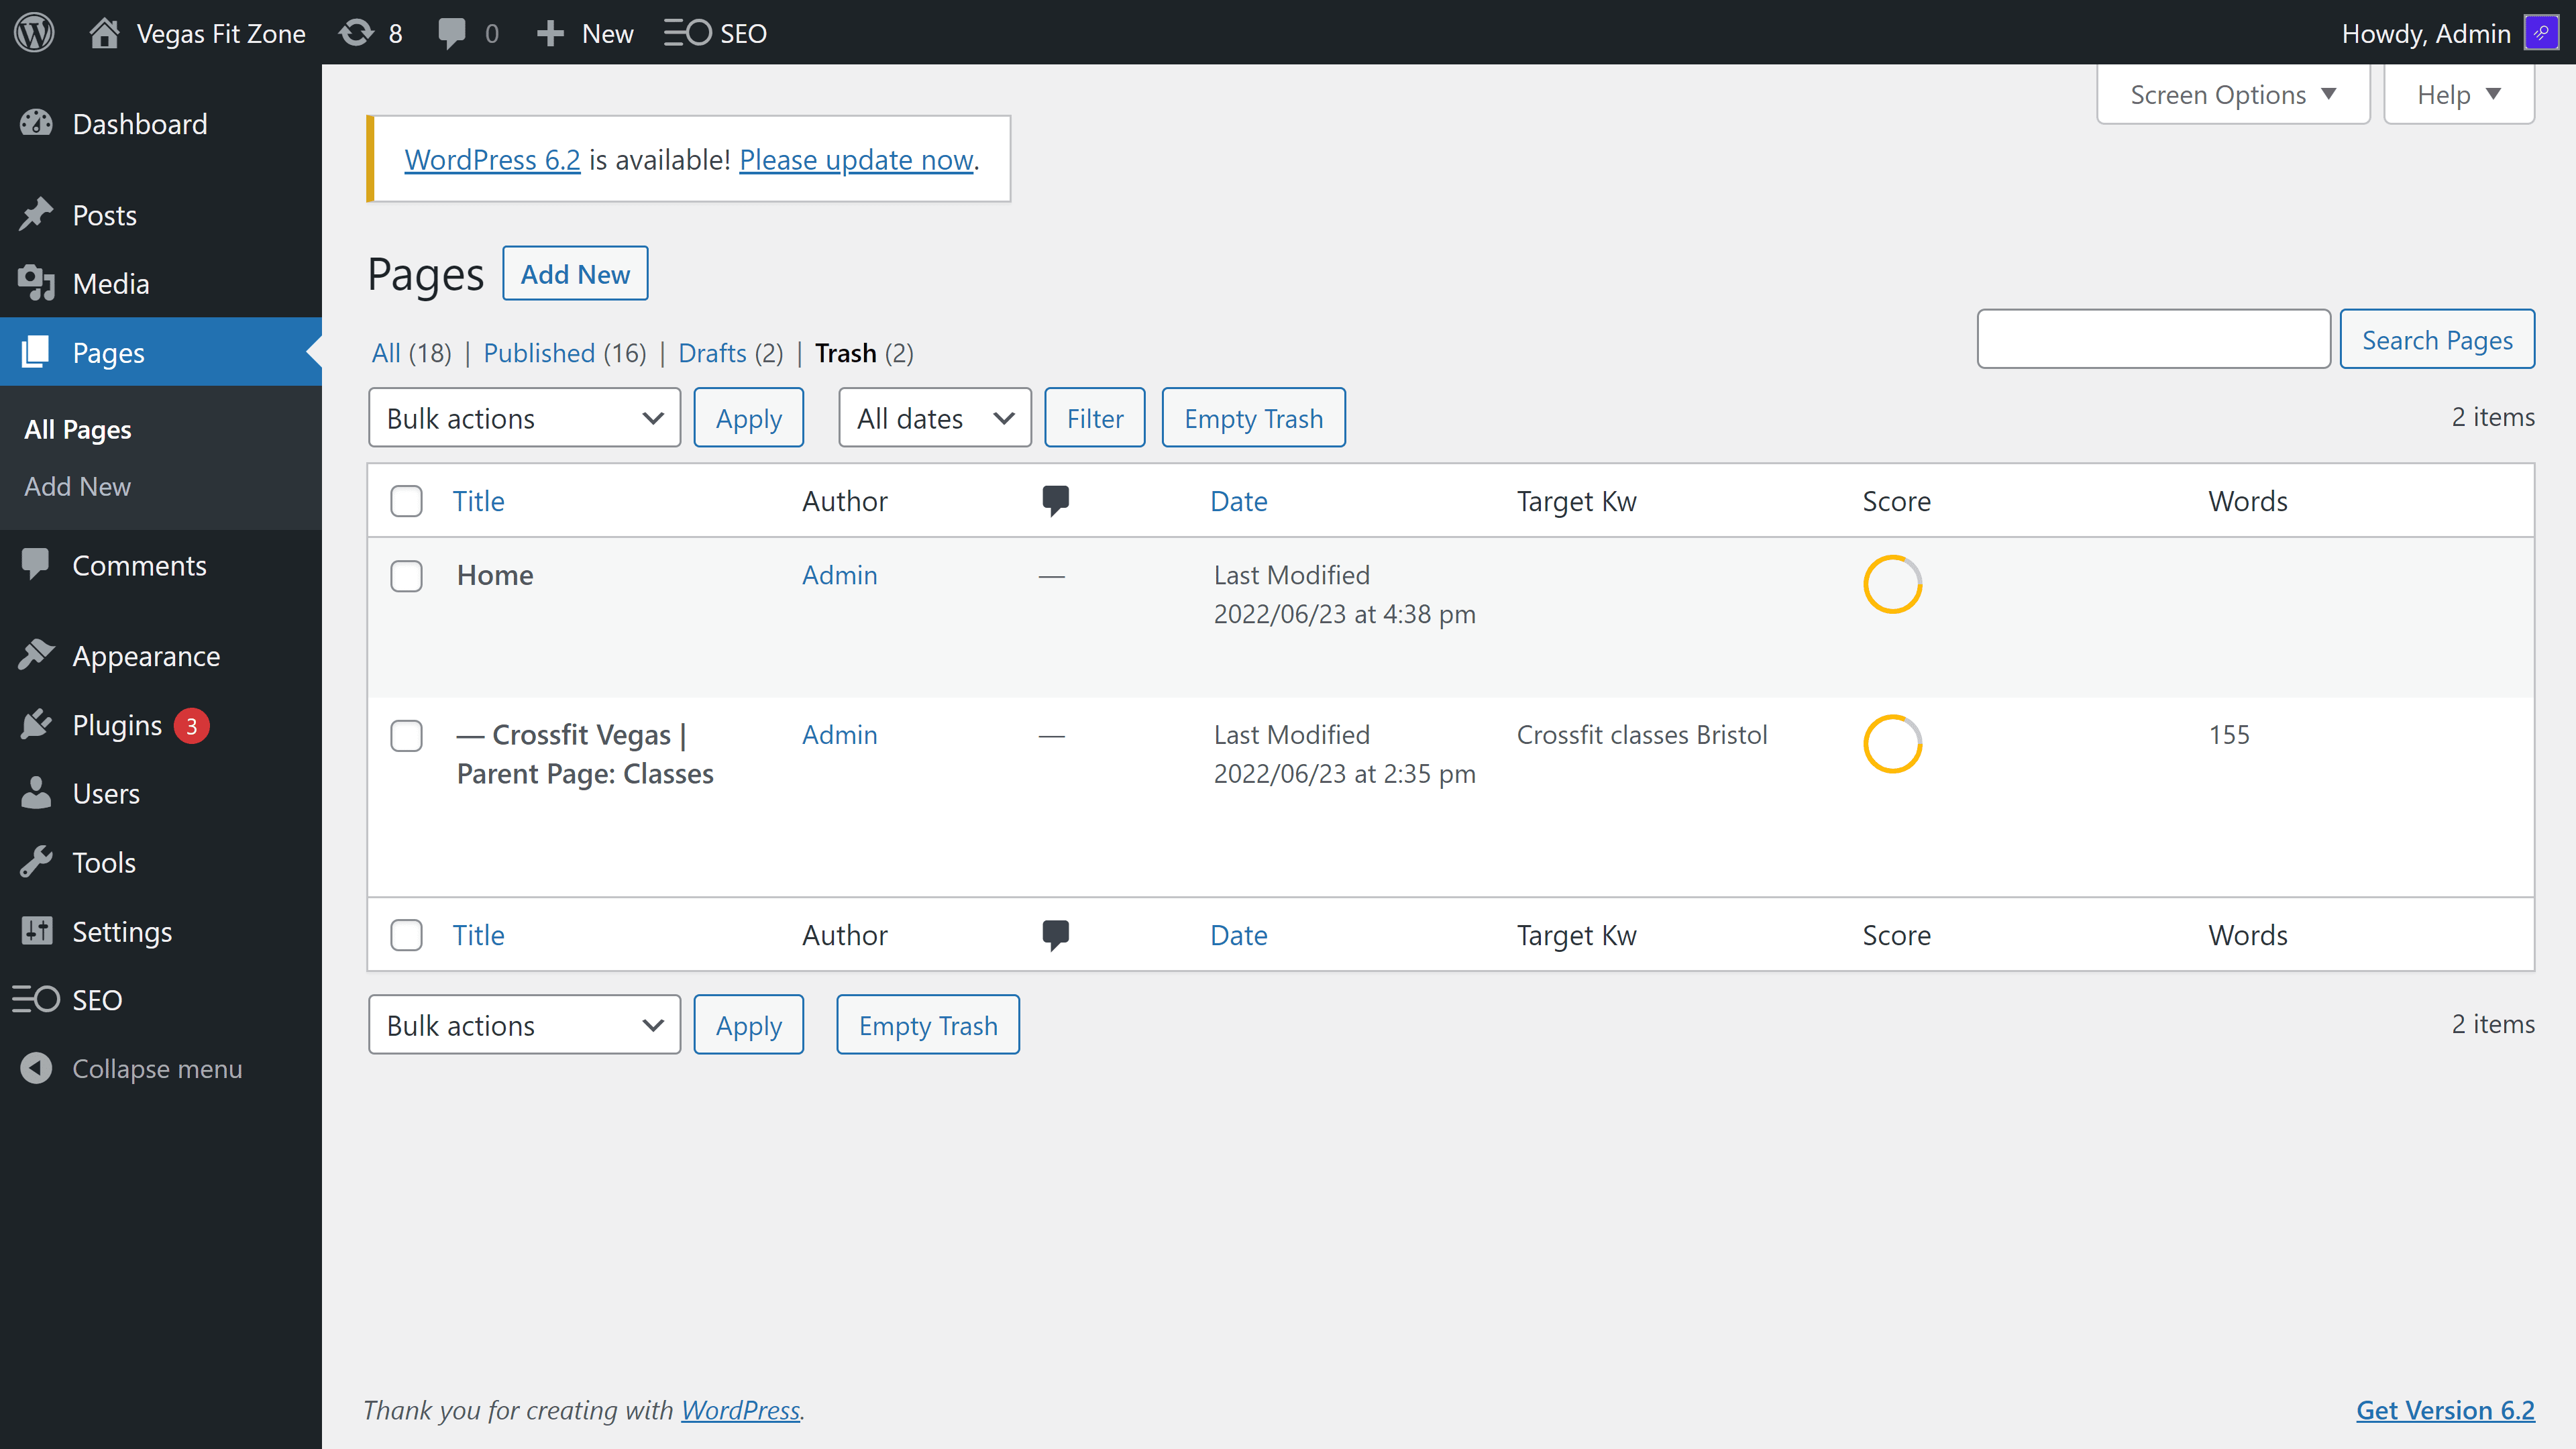
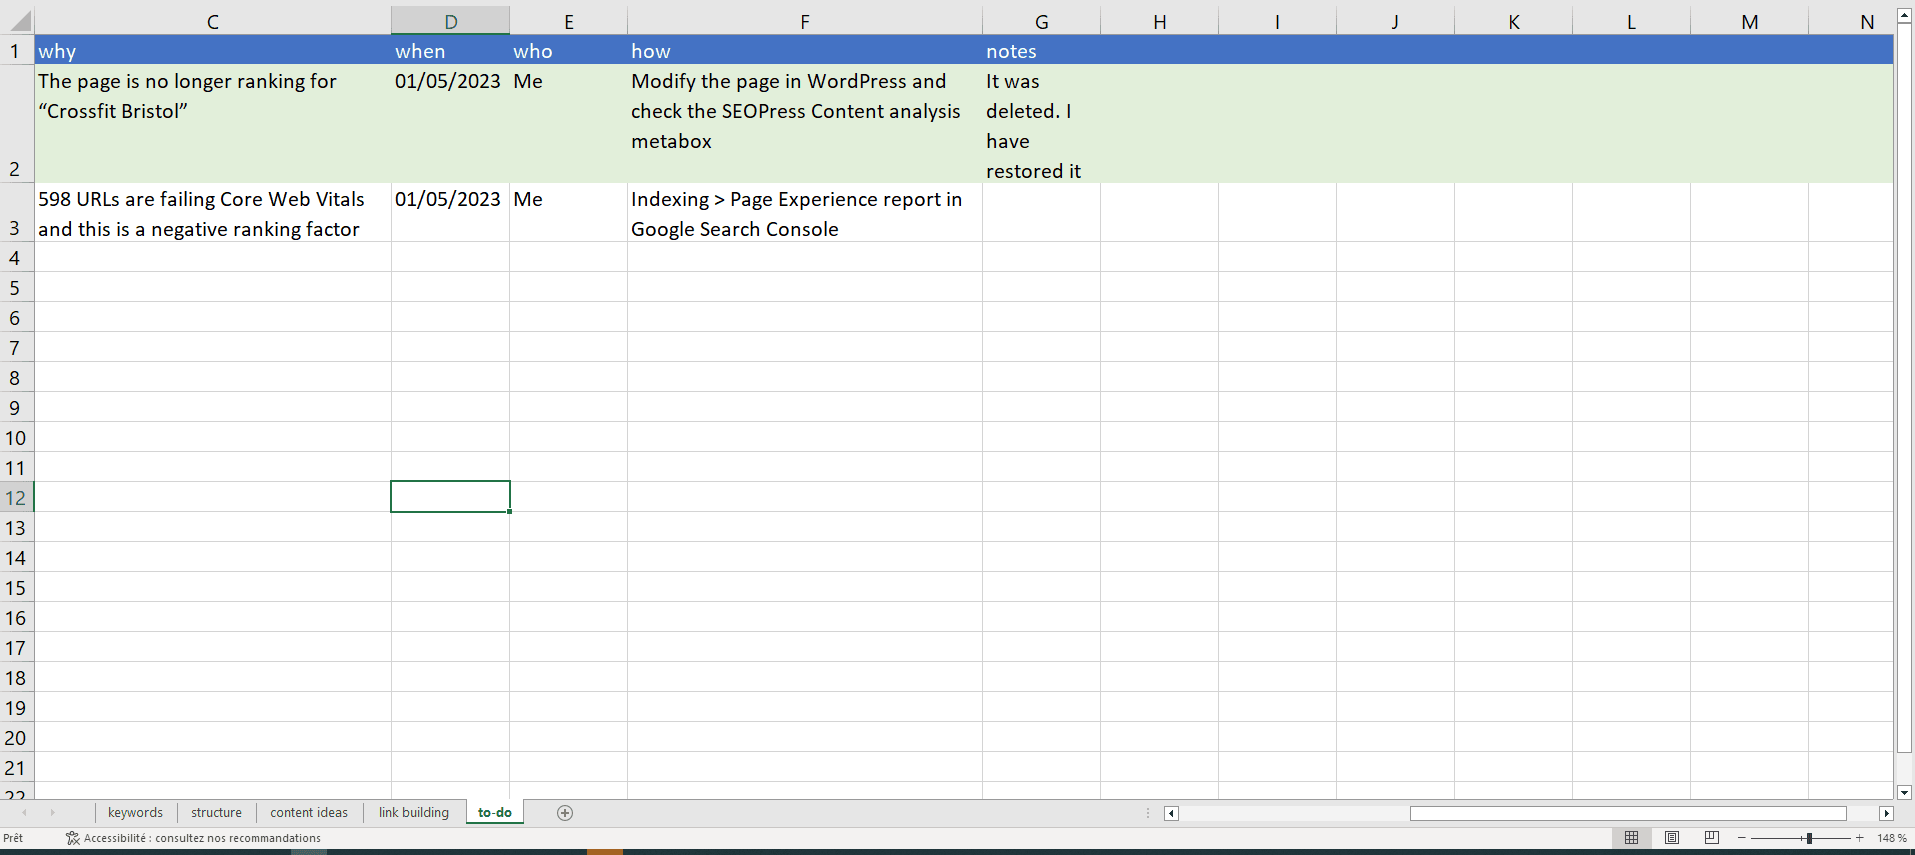
For our fictive Vegas Fit Zone site, we had noted that we should check up on the Crossfit page because it was no longer ranking in Google. We may discover here that the page has been deleted. The solution would therefore be to find it in Trash and restore it. Simple.
Add a note in the Excel file, to indicate that you have corrected the problem and color the background in green to indicate that the task has been completed.
One down, many more to go? If you have completed your To-do list, move directly onto the next step, content analysis. Don’t spend the full two hours on the To-do list either, leave some time to check your content analysis scores and check for broken links.
Check SEOPress Content analysis reports
The SEOPress Free plugin contains a powerful feature to analyze pages for on-page SEO optimization. It is accessible via a dedicated Content analysis metabox in the editor or via the Universal SEO metabox.
The content analysis tool will check your page against the most important on-page ranking factors. Where a point needs attention (shown by a red or orange light) you will find detailed notes on what needs to be done. You should aim for the overall score of “Good” (green light) for all the pages and posts that have a target keyword (Note: you will have to set the Target keywords field yourself in the Content analysis meta box based on the target keywords and target URLs you created in the SEO spreadsheet. Not all pages and posts need a target keyword).
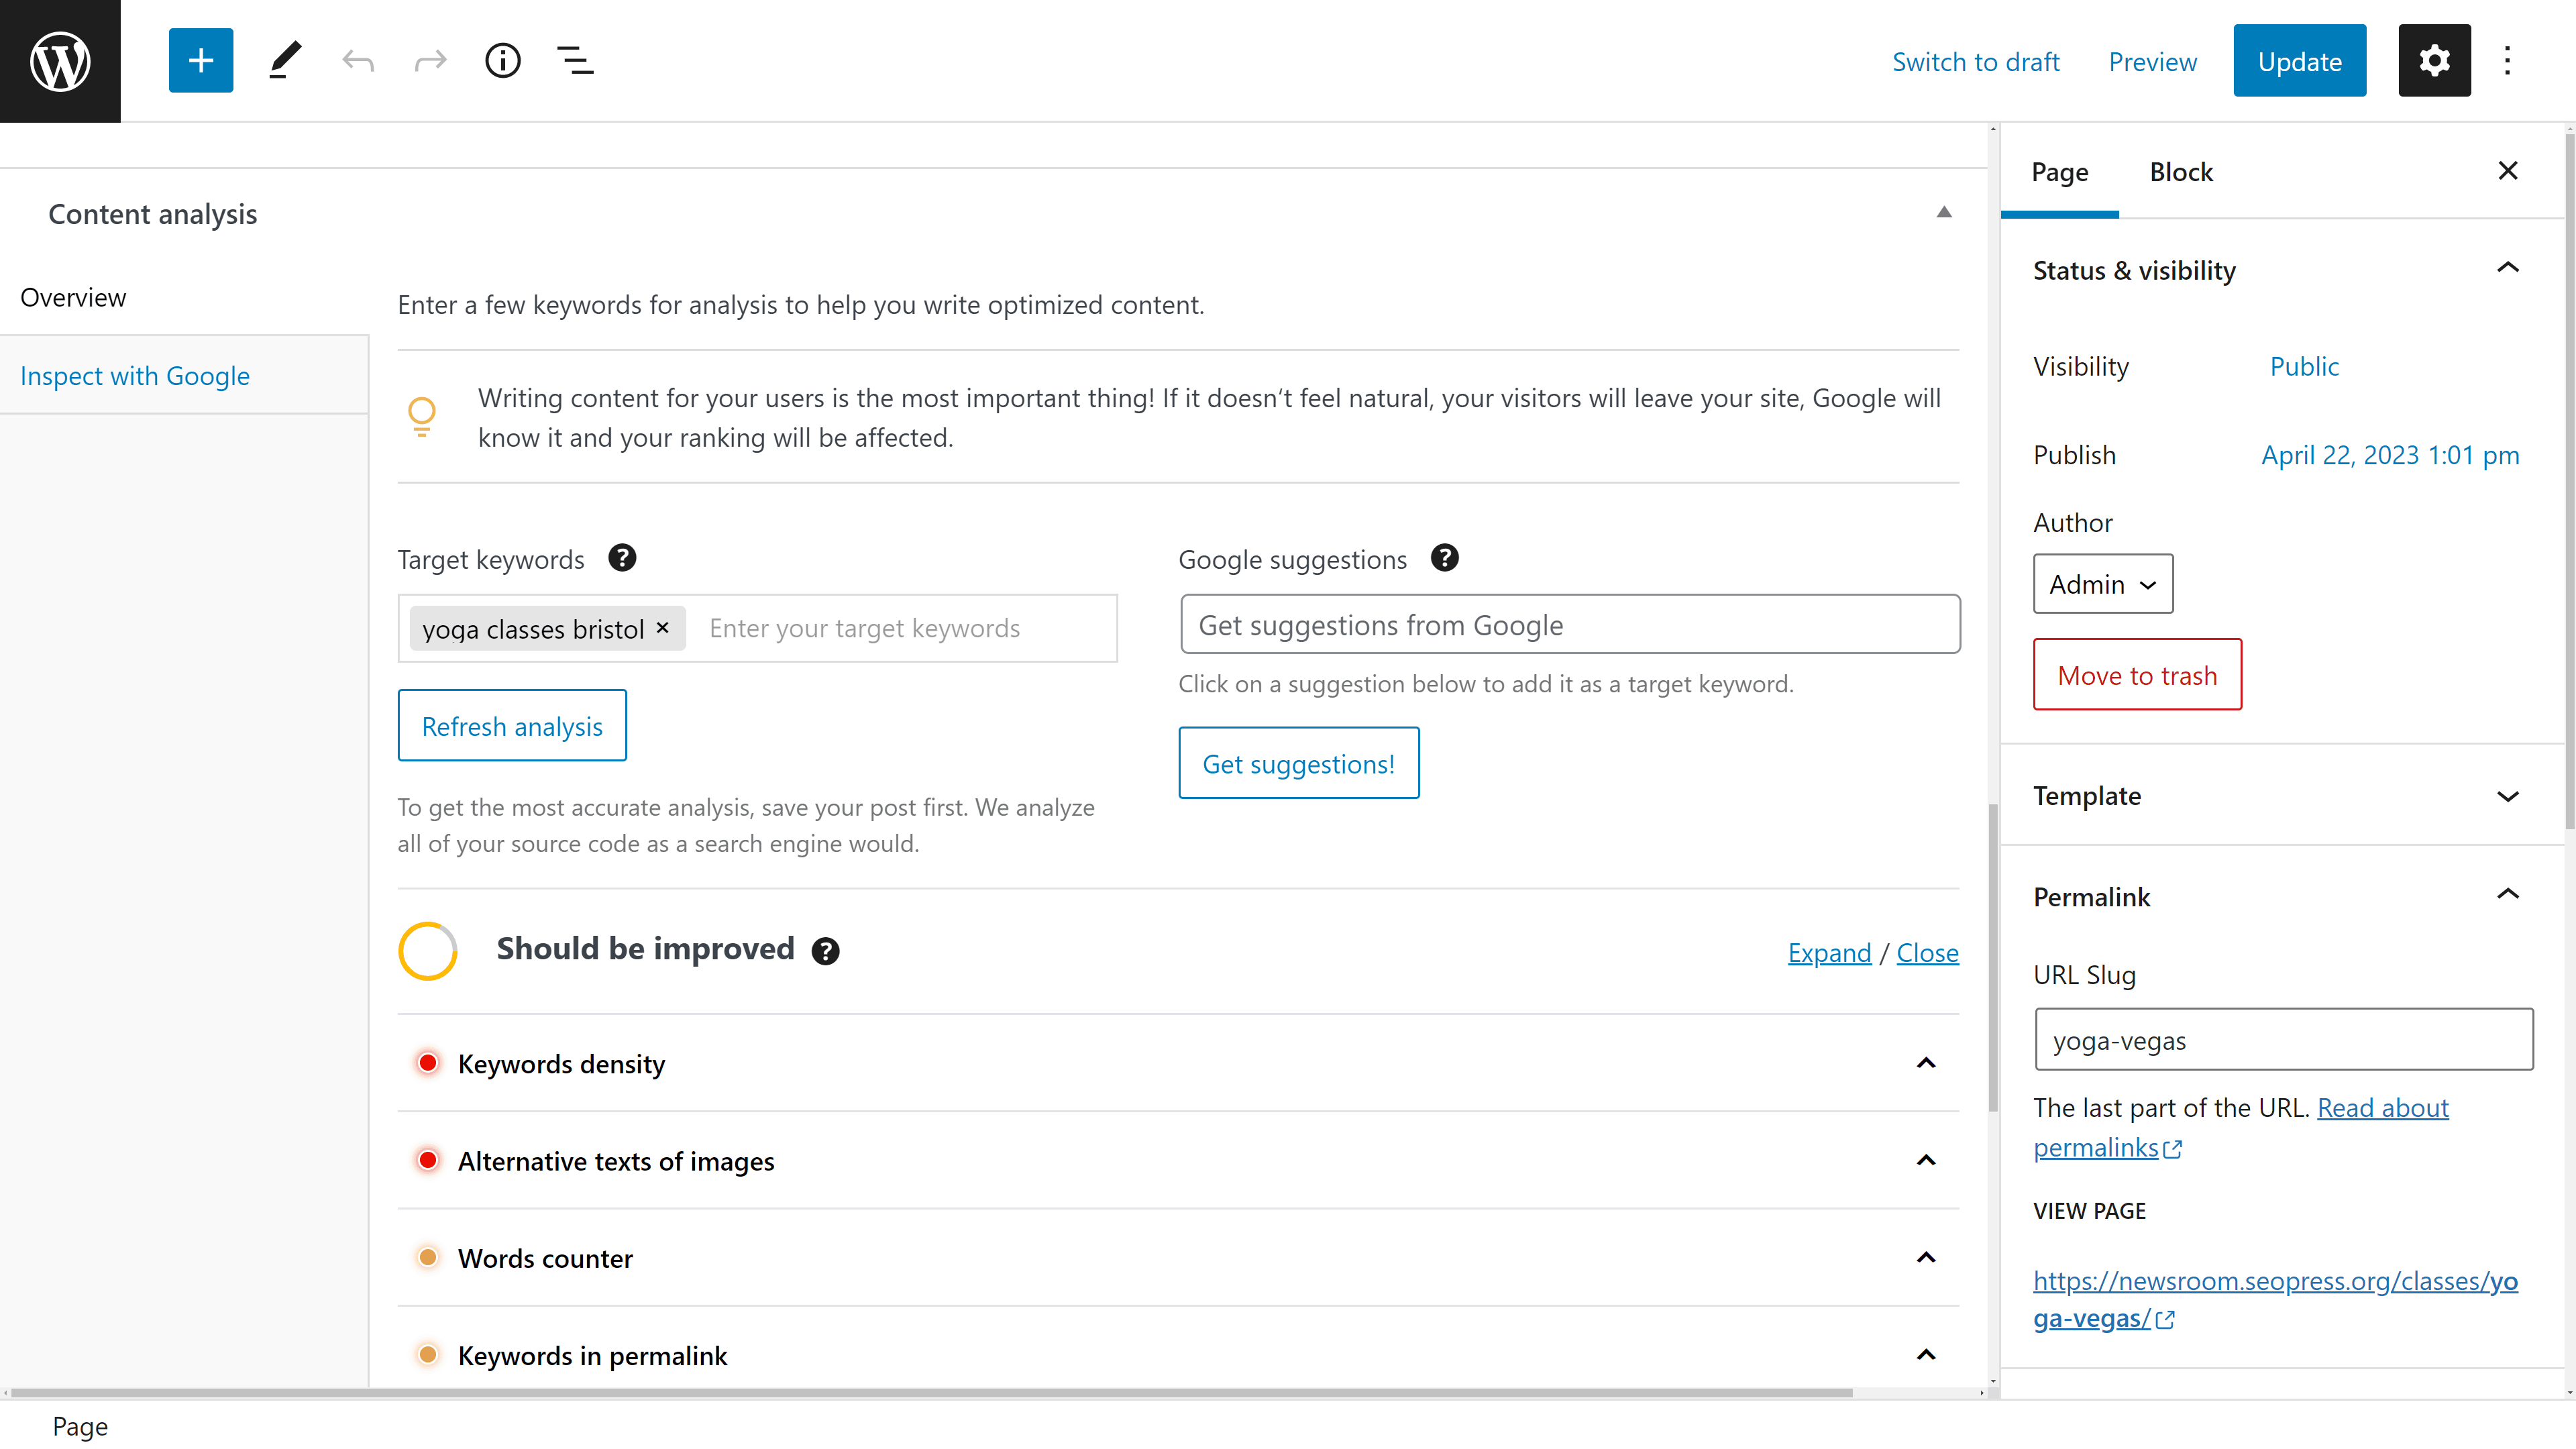
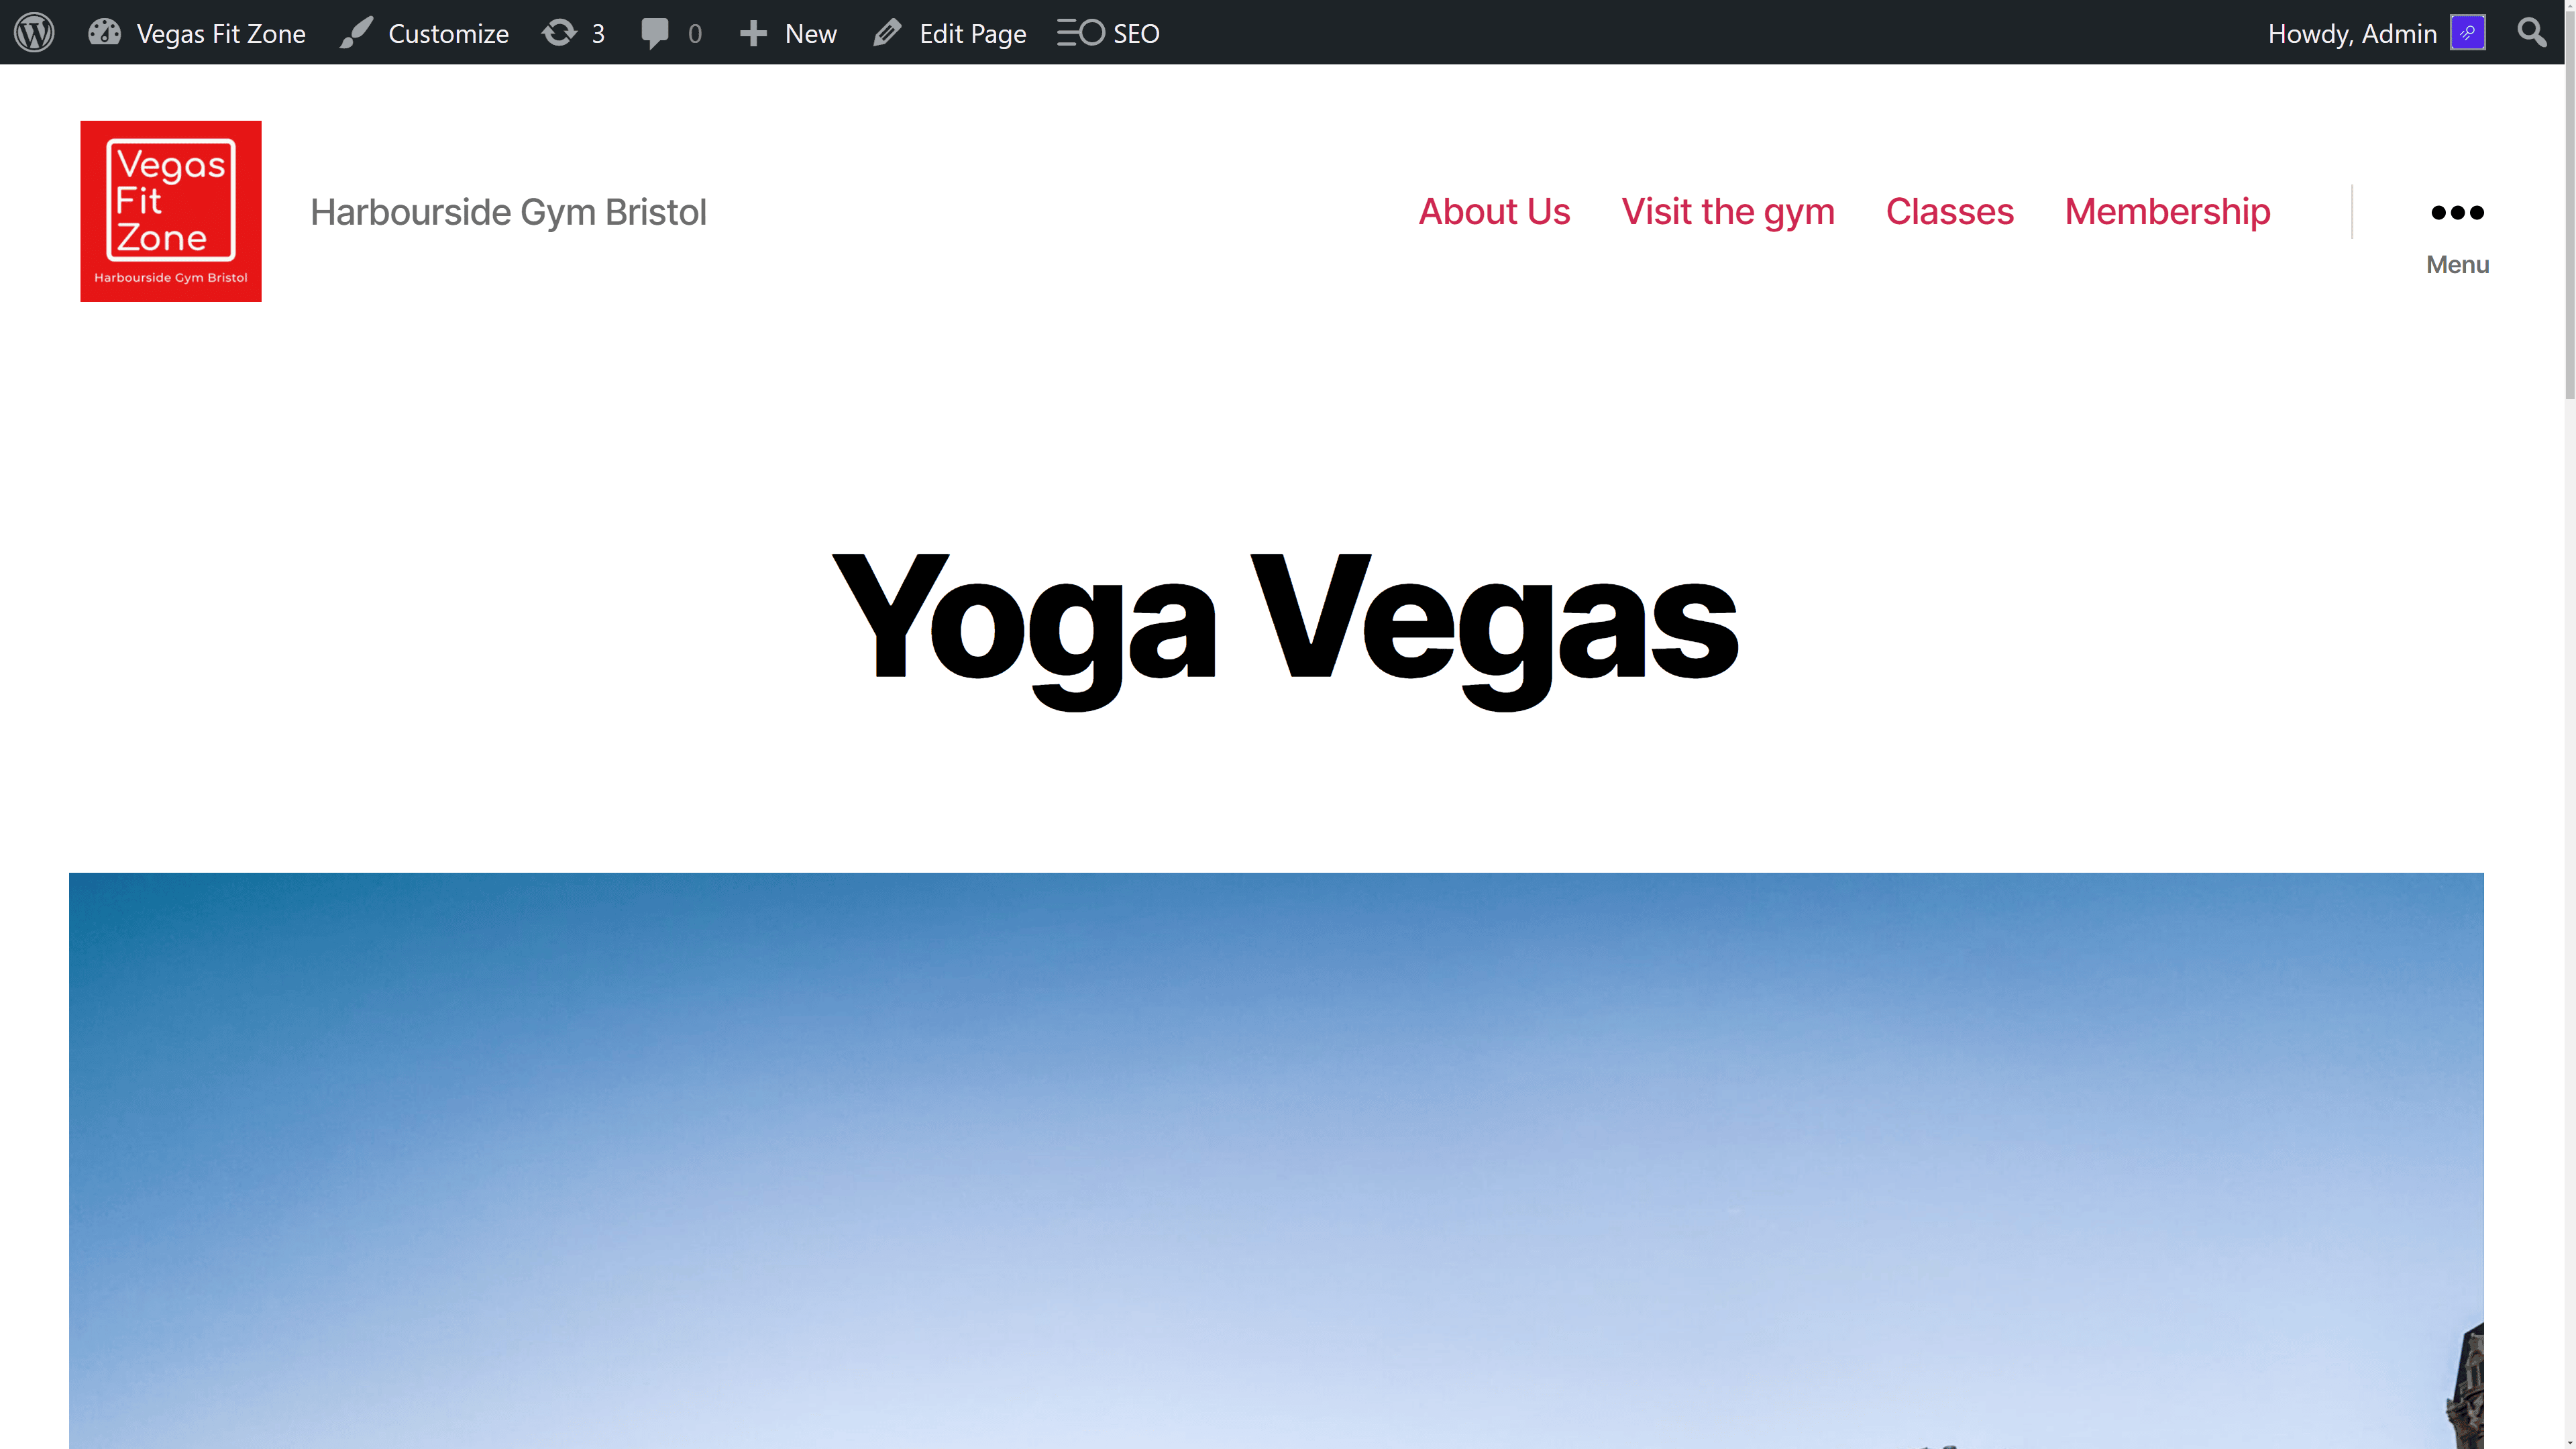
For full detail on the ranking factors analyzed by the tool, see our article How to Use Content Analysis to Improve On-Page SEO in WordPress. The most frequent errors are that keywords are not being used in URLs, titles or image ALT tags. In our fictive example of a gym in Bristol, the target keyword “Yoga Classes Bristol” is not used at all on the page at all!

To optimize this page, the title should be modified to contain the keyword “Yoga classes Bristol” and this text should also be added to the TITLE tag, the Meta Description, the ALT text of an image and be used at least once in the text and a H2 heading. The permalink should also be changed to contain the slug yoga-classes-bristol.
All these points will be detailed in the Content analysis report. While the score is still “Should be improved”, you still have work to do!
To easily see if pages and posts have been optimized, use the targeted keyword and content analysis score columns in the Pages and Posts screens as shown below.
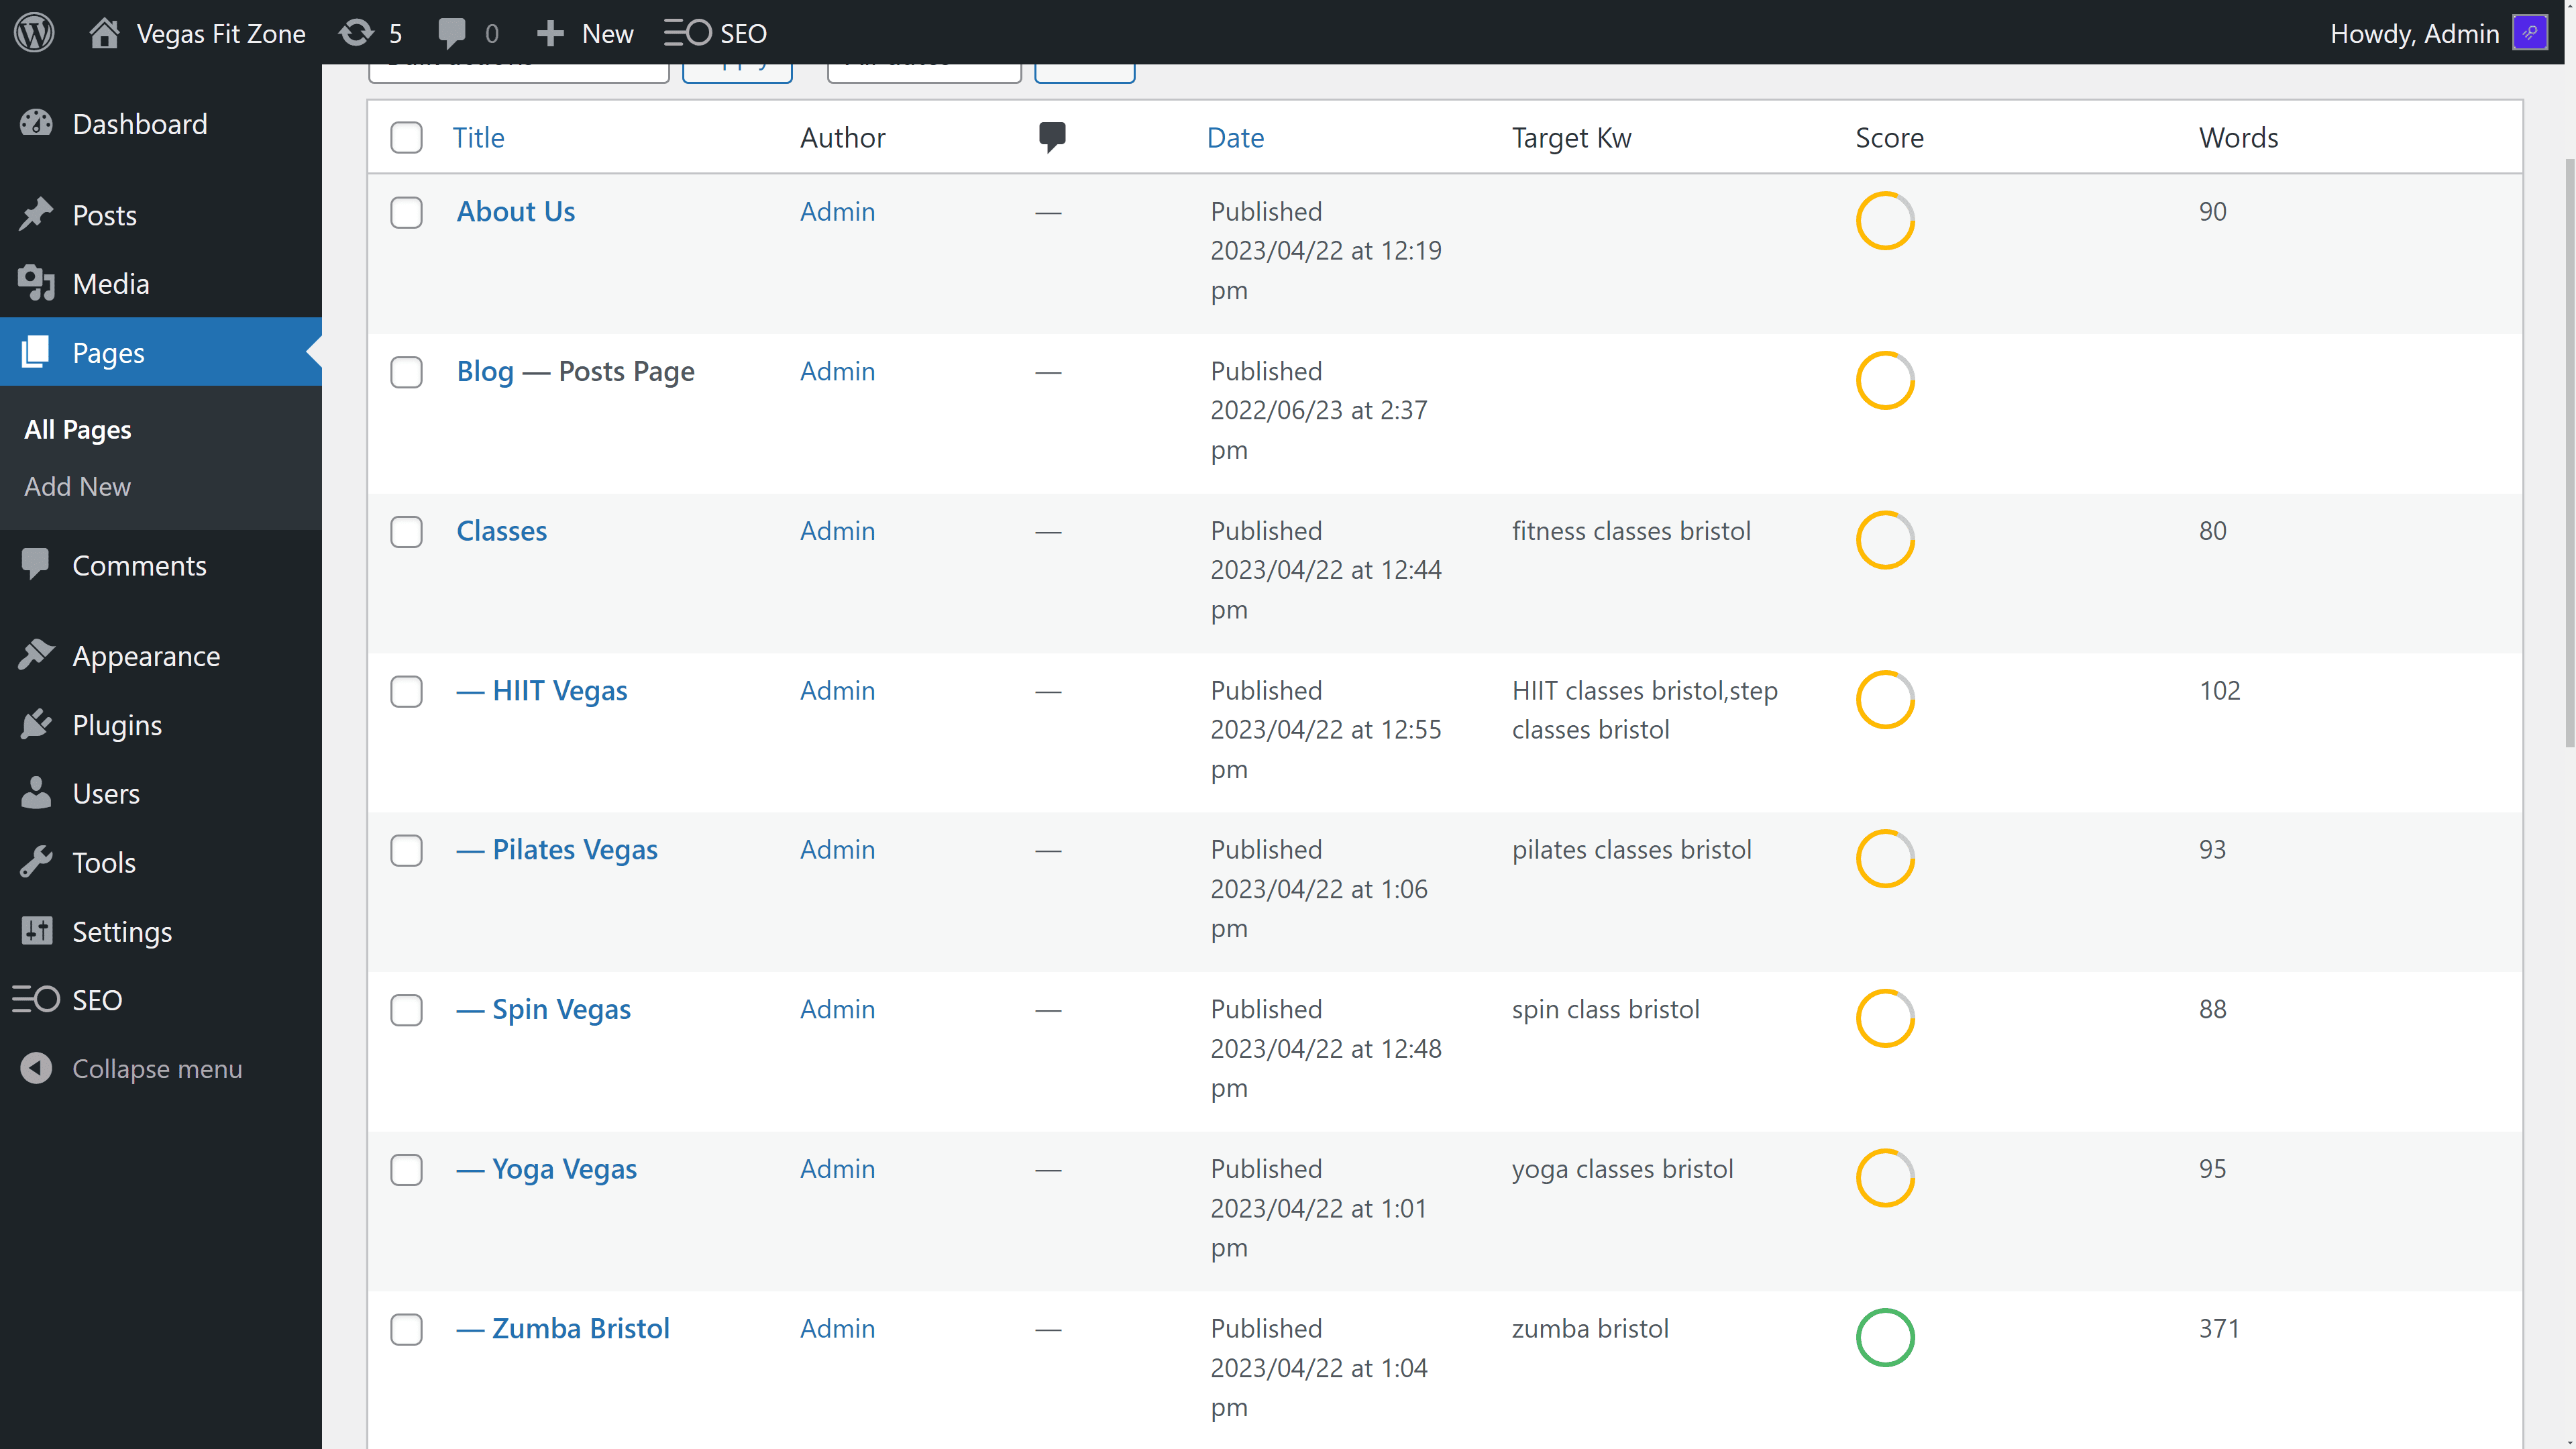
To get these columns, navigate to SEO > Advanced and click on the Appearance tab. Tick the boxes that correspond to “Show Target Keyword column in post types” and “Show content analysis score column in post types” and save changes. Back on the Pages screen, click on the Screen Options tab at the top of the screen to show or hide these columns.
Adding Schema to your existing content
One of the recommendations for on-page optimization is to have at least one structured data Schema on every page. If you do not have structured data on a page, you will see the warning “No schemas found in the source code of this page” in the content analysis report.
SEOPress PRO allows you to add structured data types to WordPress. If you are a business, the easiest and most relevant Schema to add first is the Local Business schema. This structured data provides your business address and contact details in a format that Google will understand. To set that up, navigate to SEO > PRO and click on the Local business tab.
For any type of site, adding the Breadrumbs schema to all your pages can also be a quick way of ensuring that all your pages pass the schema test in the content analysis tool. To set this up, navigate to SEO > PRO and in the Breadcrumbs tab, click “Enable JSON-LD Breadcrumbs”.
Other structured data schema fully integrated into SEOPress are Product (for WooCommerce sites), Job, Video, Service, Event, Article, Recipe, FAQ, Review, Software application, Course and How-To. You can add other structured data types using the Custom schema feature. See How to add schema markup to WordPress for a detailed guide on adding structured data to pages. Adding relevant schema can improve your ranking and enhance the appearance of your pages in Google – improving click-thru-rates and get you more traffic.
Finding broken links and handling redirections
The other issue to be very attentive of during on-page optimization, is broken links. A broken link is a link to your website that sends the user to an error message (usually a 404-error message) rather than a page. In the fictive Vegas Fit Zone example above, we saw that the Crossfit page had been inadvertently deleted. This would result in links to the Crossfit page (links in the menu and from the home page for example) sending users to an error-message page. Having too errors like this is considered bad for SEO, but it is also a poor user experience.
You can track broke links in SEOPress by navigating to SEO > Audit and clicking on Launch the bot!
The best solution may be to restore a deleted page, but what if there was a good reason why a page was deleted (you no longer have a teacher for Crossfit classes, for example)? The alternative solution is to set up a redirection from the deleted page to an existing page.
If the deleted page had the full URL https://www.example.com/classes/crossfit-vegas/ and you want to redirect it to the Classes page https://www.example.com/classes/ then you could set up the redirection like this using the SEO > Redirections feature in SEOPress like this:
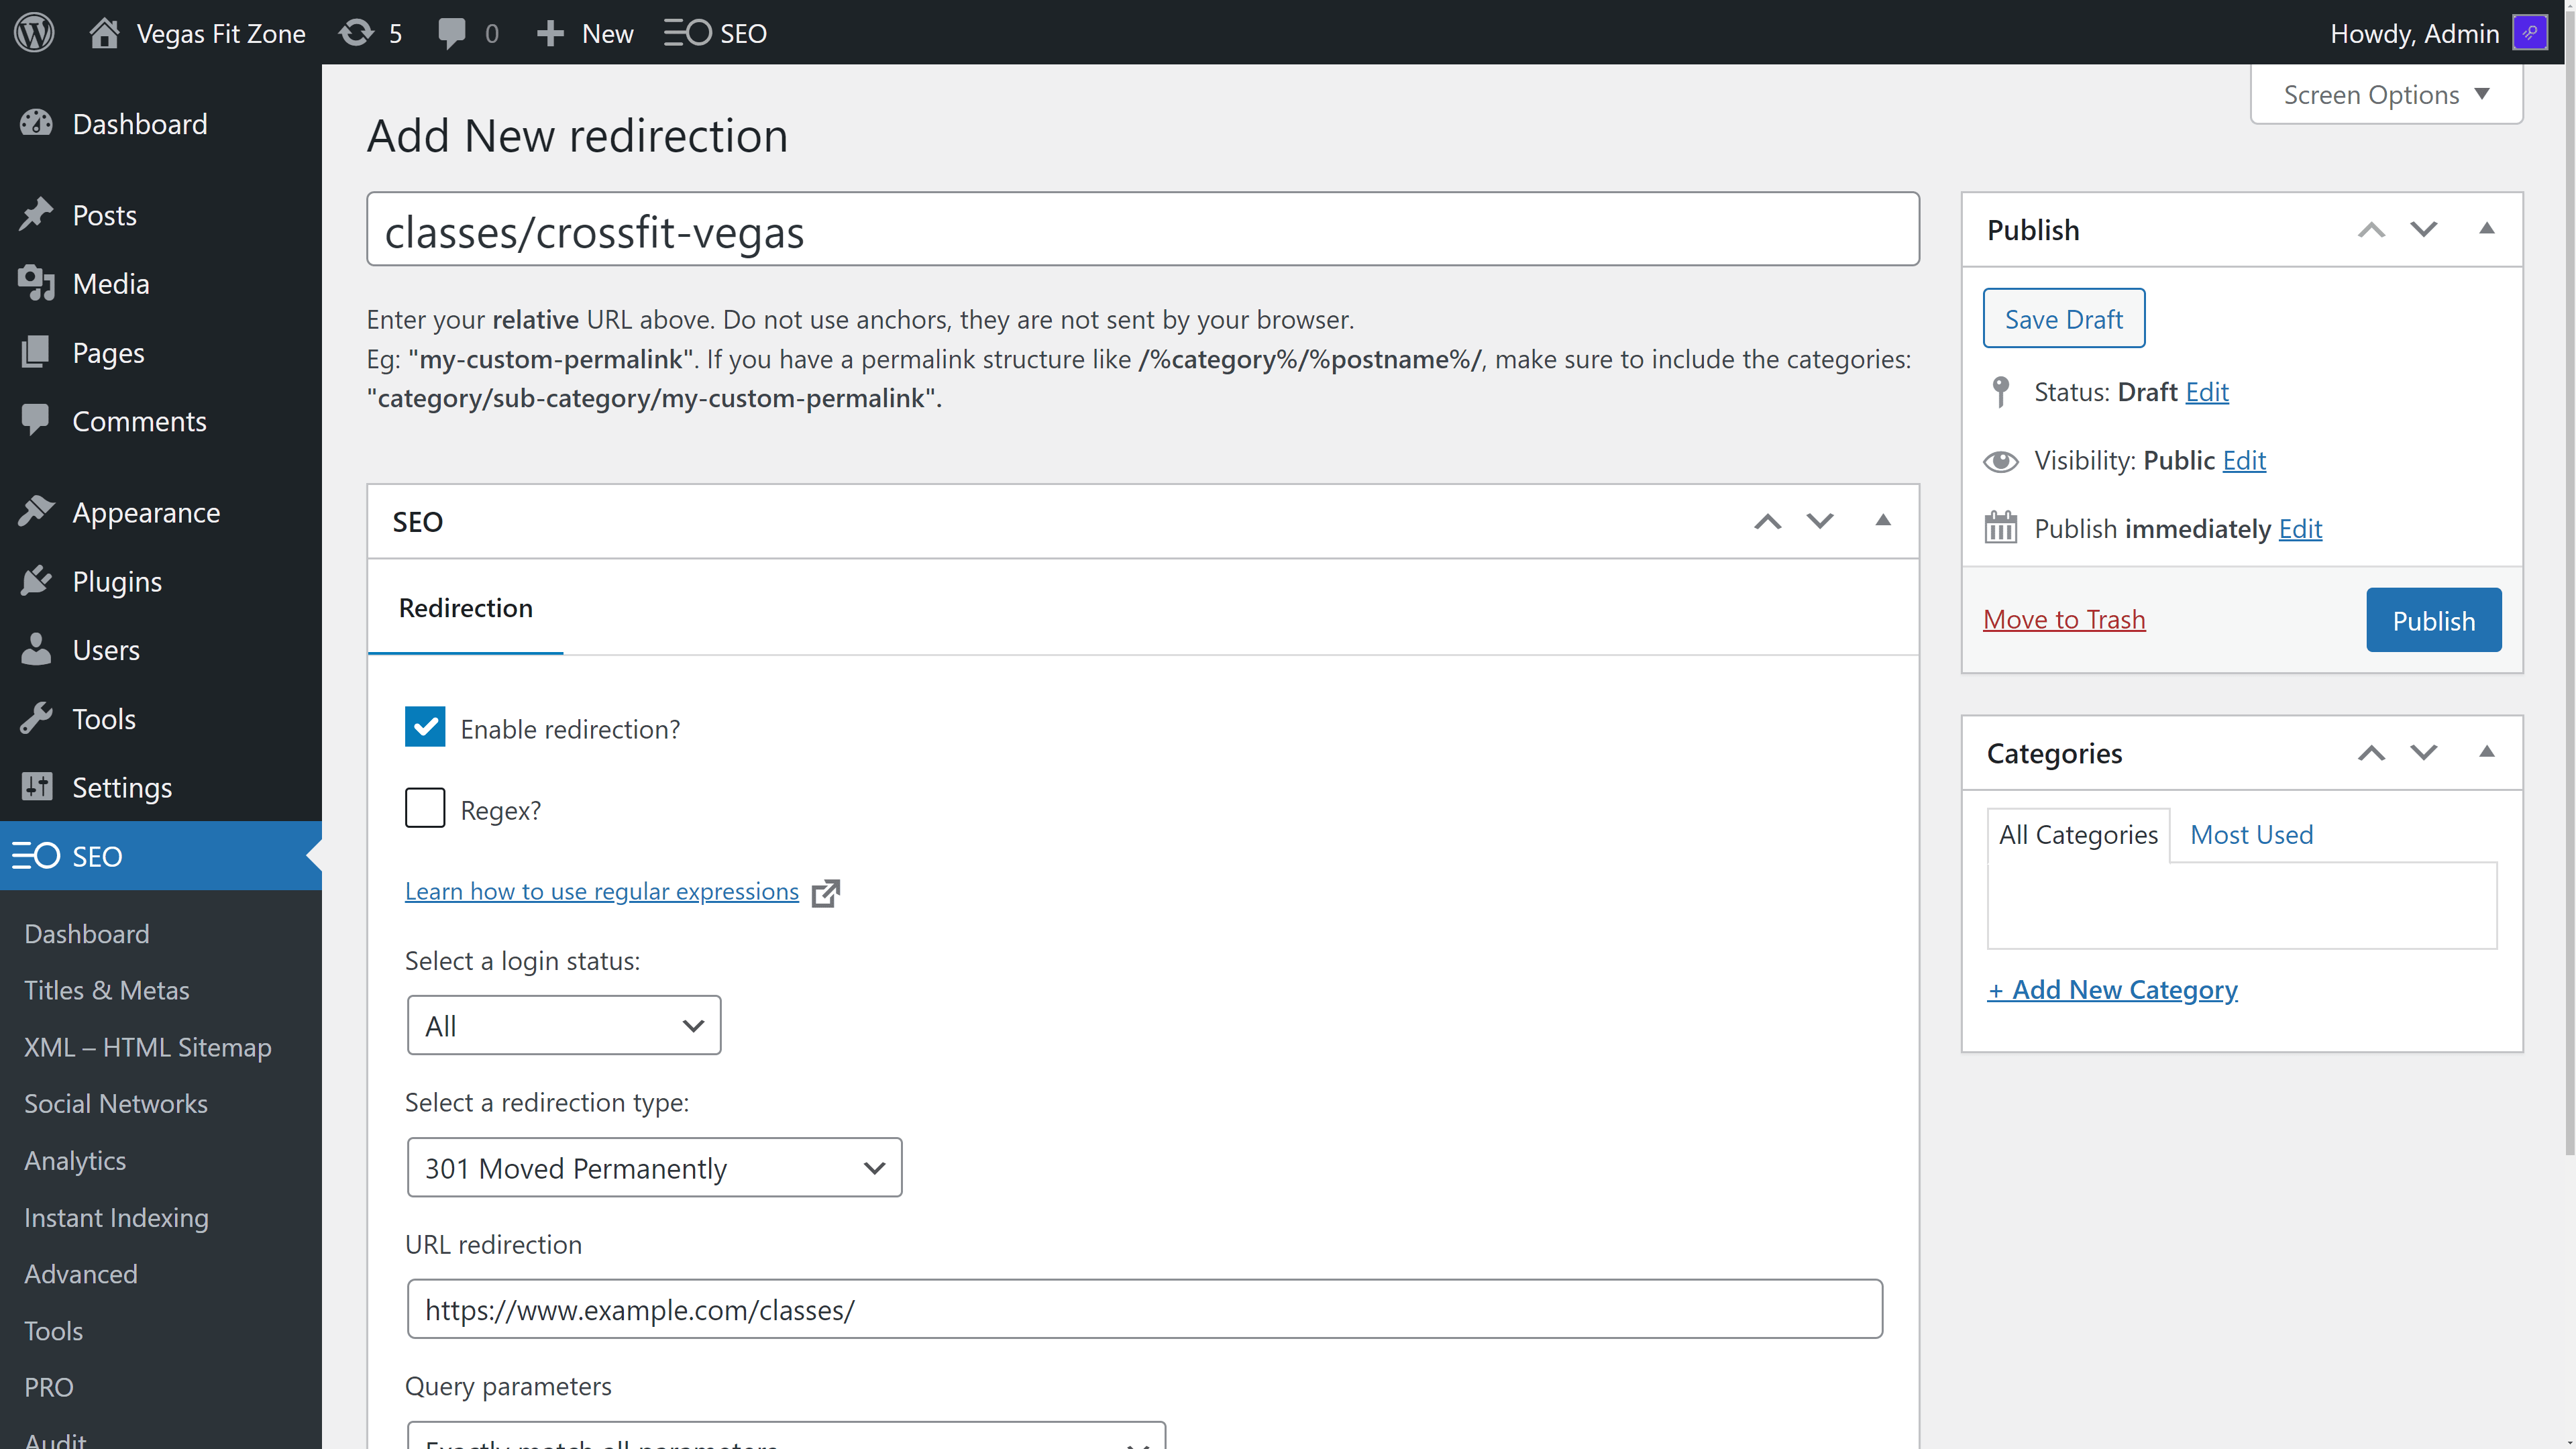
Note that the deleted URL, entered at the top of the page, is written as a “relative URL” (i.e. without https://www.example.com/) but the destination URL is written in full. It is important to check the “Enable redirection” checkbox and to click Publish to activate the URL.
Any user (including Google) who now tries to access https://www.example.com/classes/crossfit-vegas/ will be redirected to https://www.example.com/classes/ and not an error message.
Even if you do delete internal links to deleted pages, it is still good practice to add a redirection if that page has already been indexed by Google.
Handling errors from Google Search Console
Google will indicate any 404 errors it has found on your site in the Google Search Console Page indexing reports and you may have noted some of these types of errors during Week one of your SEO routine. Set up redirections for these 404 errors following the process above.
To interpret other errors found in Google Search Console, see our overview on How to troubleshoot indexing issues in Google Search Console.
It is possible that 2 hours is not enough to deal with all your tasks and on-page optimizations suggested by the content analysis tool. But as you keep working on this list you are making incremental improvements to your site that will help it rank better in Google for the keywords you are targeting.
If you start to get the impression that the list is never ending, your impression is correct. SEO is a continuous process. It is why you need to keep dedicating 2 hours a week to improving your ranking.